If you need a simple and convenient way to create a rent receipt, a JPG rent receipt template is a great choice. It allows you to quickly fill in the necessary details, such as tenant information, rental amount, and payment date, without requiring any complex software. These templates are available online for free or at affordable prices, making it easy to find one that suits your needs.
When choosing a template, ensure it includes all relevant details like the tenant’s name, landlord’s name, rental amount, payment date, and the duration of the rental period. This information helps both parties keep accurate records for future reference.
A JPG rent receipt is easily printable, and you can customize it with your own branding or design elements. Simply download the template, edit the text, and save it as a JPG file for printing or sharing with your tenant. This straightforward approach ensures you have a professional and accurate document every time.
Here’s the revised version with word repetitions minimized:
To create a clear and professional rent receipt template in JPG format, focus on key elements that make the document informative and easy to read. A good template should include the following details:
- Tenant Information: Name, address, and contact details.
- Landlord Information: Name, address, and contact details.
- Payment Details: Date of payment, amount paid, and method of payment.
- Property Information: Property address, rental period, and unit number if applicable.
- Signature: Signature of the landlord or authorized agent confirming receipt of payment.
How to Customize the Template
Modify the template by adjusting fonts and adding the property’s logo for personalization. Ensure the layout remains clean, with clear spaces for each section. The template should be straightforward, so tenants can easily verify their payment details without confusion.
Saving and Sharing the Template
Once you’ve filled in the necessary fields, save the file in JPG format. This ensures the document is easily viewable on most devices. Sharing the rent receipt via email or printing it out are both good options to ensure tenants receive it promptly after payment is made.
- Rent Receipt Template JPG: A Practical Guide
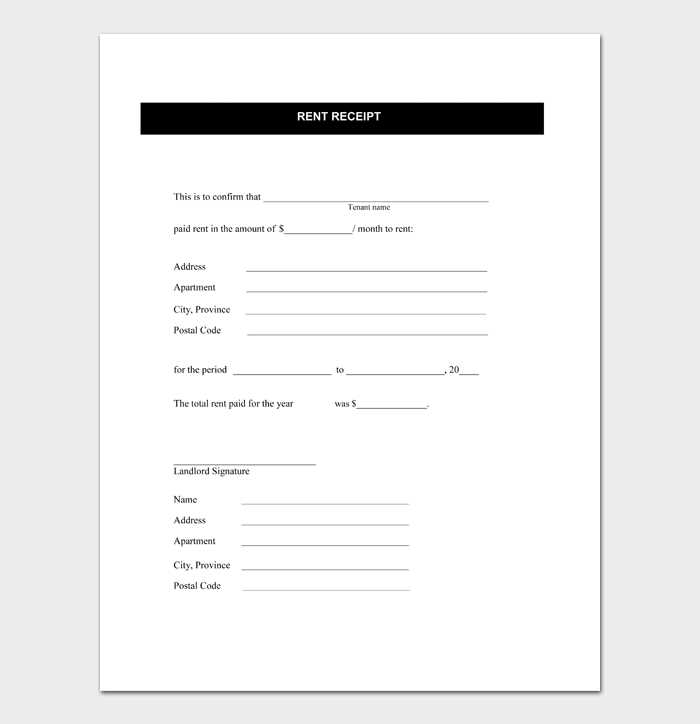
To create a rent receipt in JPG format, start with a clean layout. Make sure to include the following key elements:
- Landlord’s name and contact information
- Tenant’s name and contact information
- Address of the rental property
- Date of payment
- Amount paid
- Payment method
- Signature of the landlord (optional)
Once you have all the required information, use a template editor to arrange the content clearly. Choose a professional font, avoid overcrowding the document, and ensure the text is legible. Save the document as a JPG file for easy sharing or printing.
Sample Rent Receipt Layout
| Landlord Information | Tenant Information |
|---|---|
| Name: [Landlord Name] | Name: [Tenant Name] |
| Phone: [Landlord Contact] | Phone: [Tenant Contact] |
| Email: [Landlord Email] | Email: [Tenant Email] |
| Payment Details | Property Address |
| Date: [Payment Date] | Address: [Property Address] |
| Amount Paid: [Amount] | Rent Period: [Start – End Date] |
| Payment Method: [Cash/Card/Other] | Payment Reference (if any): [Reference] |
This layout ensures that both parties have all the necessary details in an organized format. Once your template is ready, you can generate the JPG file and distribute it as needed.
To create a rent receipt in JPG format, start by using a word processor or a design tool like Microsoft Word, Google Docs, or Canva. First, set up the receipt layout, including fields such as tenant’s name, landlord’s name, rental property address, payment date, and amount received. Ensure clarity by using appropriate fonts and spacing. Include a unique receipt number for reference. Once the receipt details are filled in, take a screenshot or use the “Save as” option to export the document as a JPG file. This will create a clear, professional-looking receipt in an easily shareable format.
For better quality, adjust the image resolution to at least 300 DPI to maintain sharpness when sending or printing. You can also use online tools like Adobe Spark or PicResize to refine the image size or crop unnecessary parts. Make sure the receipt is easy to read by keeping text contrast high and formatting clean.
To create a rent receipt that fits various purposes, focus on specific details that reflect the tenant’s situation. A clean, clear format ensures all necessary information is easily found.
- Include Tenant and Landlord Details: Always list both parties’ names and contact info to avoid confusion. This is especially important for official records or disputes.
- Specify Payment Methods: If a tenant uses a variety of payment methods, include a section for specifying whether payment was made by cash, check, or electronic transfer.
- Highlight Rent Period: Clearly state the start and end dates for the rent period. This can vary depending on whether rent is monthly, quarterly, or another schedule.
- Adjust for Special Agreements: If the tenant has specific agreements, such as early payment discounts or additional fees for late payments, make these terms visible on the receipt.
- Customizable Fields: Some templates allow customization where you can add or remove fields according to your needs, such as for security deposits, pet fees, or maintenance costs.
With these adjustments, a rent receipt will be tailored to both the landlord’s and tenant’s requirements, helping keep records clear and professional.
Clearly list the tenant’s name and address, ensuring they match the details from the rental agreement. This helps identify the parties involved and avoids confusion. Include the landlord’s name, address, and contact information as well for transparency.
Details of the Payment
Include the amount paid, the payment method (cash, check, bank transfer), and the payment date. Specify the rental period covered by this payment, such as from one month to the next. This confirms the scope of the transaction.
Receipt Number
Each receipt should have a unique identifier for record-keeping and future reference. This ensures easy tracking of payments and prevents duplication.
Lastly, add a statement confirming that the payment has been received in full, avoiding ambiguity. If there are any adjustments or late fees, include them in a clear breakdown to prevent misunderstandings.
To create rent receipt files in JPG format, graphic design software and online tools offer practical solutions. Use programs like Adobe Photoshop or GIMP for designing customized receipts with flexibility. These tools allow you to add text, images, and logos, ensuring your receipts meet specific requirements.
If you’re looking for a quicker method, online platforms like Canva or Fotor provide templates tailored to rent receipts. With drag-and-drop functionality, you can easily insert necessary details, modify layouts, and export your work as JPG files. These tools are particularly useful for users without advanced design skills.
For users preferring a straightforward approach, Microsoft Word and Google Docs allow for simple receipt creation. After typing the necessary details, take a screenshot or use a PDF-to-JPG converter to generate the final image. This method is fast and convenient when minimal design is required.
Other options like Snagit can capture parts of documents and save them as JPG images. This tool is excellent for quick capture of receipts already prepared in a word processor or email format.
Use a straightforward approach to convert your rent receipt template into a JPG image. The first step is to create or open the template in a document or design software like Microsoft Word, Google Docs, or any photo editing program. Once your template is ready, follow these steps:
1. Save the Document as a PDF
Start by saving the rent receipt as a PDF. This format preserves the layout and structure, which is key for a clear image. Most software allows saving documents directly as PDFs from the “File” menu. Look for the “Save As” or “Export” option and choose PDF as the file format.
2. Convert the PDF to JPG
After saving the file as a PDF, convert it into a JPG image. Use an online PDF to JPG converter, such as Smallpdf or PDF2JPG, or install a dedicated tool like Adobe Acrobat or GIMP. Upload the PDF to the converter, choose JPG as the output format, and save the resulting image.
Once you have your JPG file, it’s ready to be shared or printed as needed. This method ensures your rent receipt retains its original design while being accessible in an image format.
Store rent receipts as JPG files in organized folders on your computer or cloud service. Label each file with clear, consistent naming conventions, such as the tenant’s name, date, and month of payment, to quickly identify them when needed.
Choose High-Quality Scanning or Photography
Ensure the JPG files are high-resolution to capture all relevant details. Avoid blurry or pixelated images, as this can complicate the verification process. Use a scanner for optimal results or ensure good lighting when photographing the receipt.
Secure Storage and Backup
Keep rent receipts in a secure, backed-up location. Using encrypted cloud storage or external drives helps protect the data from accidental loss or unauthorized access. Make regular backups to avoid potential issues with file corruption or system failures.
When sharing receipts, always send them via secure channels. Avoid email attachments without encryption or unprotected sharing methods. For added privacy, compress the JPG file into a password-protected zip folder before sending it to the landlord or tenant.
By following these simple steps, you can efficiently store and share rent receipts while ensuring the integrity and privacy of your records.
To ensure clarity and accuracy in rent receipt documents, structure the list items logically, with clear formatting. A simple ordered list can help organize the data effectively. Begin with the date of the transaction followed by the tenant’s name, amount paid, and payment method. Each detail should be listed clearly, without ambiguity. This ensures all parties involved can easily reference and understand the receipt at a glance.
Formatting Recommendations
For an organized look, consider using alternating lines for each item in your ordered list. This increases readability, especially in lengthy receipts. Include a space between items for better visual separation, and use basic font styles for emphasis, such as bold for headings like “Amount Paid” or “Payment Method.” Maintain uniform font sizes for clarity.
Final Touches
Ensure that each rent receipt includes a signature line at the bottom, especially if it’s a printed version. This provides a clear indication of the document’s legitimacy and finalization. This step may seem small but adds to the professional appearance of the template.