Creating an editable restaurant receipt template streamlines your billing process and ensures accuracy every time. By using a customizable format, you can easily update or adjust details, offering flexibility for various transactions.
Start with key information like the restaurant name, address, and contact details. These elements should be fixed, as they stay the same across all receipts. Use a clean, simple design to allow for quick adjustments.
For the itemized list, include sections for quantity, description, unit price, and total. This breakdown provides clarity for customers while keeping track of your inventory and sales easily.
Finally, add space for a tax section and a tip option, both of which are commonly adjusted. Having these fields editable ensures your receipts can accommodate various scenarios without needing to reformat each time.
Here are the corrected lines:
Ensure the receipt template includes clear fields for date, order number, and payment method. Avoid unnecessary clutter and focus on simplicity. Make sure each item on the receipt is aligned neatly, with price and quantity clearly stated. A clear footer with business information and tax details is necessary to maintain transparency. Also, include a space for customer comments if applicable.
Double-check that the currency symbol is placed correctly before the total amount. The font size should be consistent across the receipt, with special attention to the bolding of important details like totals. If offering a discount, clearly mark it and calculate the final amount accordingly. A concise section for payment confirmation, such as “Paid” or “Unpaid,” will help avoid confusion.
- Editable Restaurant Receipt Template
An editable restaurant receipt template allows you to quickly generate customized receipts for customers. By using a flexible design, you can adjust key details like restaurant name, items, prices, taxes, and payment methods. This saves time and reduces errors compared to manually creating receipts. Here are a few benefits of using an editable template:
- Customization: Modify the template to reflect your restaurant’s unique branding, including logos, fonts, and colors.
- Quick Modifications: Instantly update the receipt for promotions, special items, or seasonal menus.
- Accuracy: Ensure accurate calculations by incorporating auto-formulas for totals, taxes, and tips.
- Consistency: Provide customers with a professional, uniform experience every time.
How to Use an Editable Restaurant Receipt Template

To get started, select a template compatible with your preferred software (Word, Excel, Google Docs, or specialized POS systems). Customize the fields such as item descriptions, quantity, and price. The template should automatically calculate totals, taxes, and any applicable discounts. Make sure to add a payment method section to track the payment type, such as cash, card, or mobile payments.
Best Practices

- Ensure the font is clear and easy to read.
- Place your restaurant’s contact information at the top for easy access.
- Keep a space for tips and discounts to give customers full transparency.
- Save the templates in multiple formats, like PDF and Excel, for convenience.
With an editable restaurant receipt template, you simplify the billing process, enhance customer satisfaction, and streamline operations.
Begin with selecting a clear, easy-to-read font that matches your restaurant’s branding. Avoid overly decorative fonts that might compromise legibility. Focus on fonts like Arial or Helvetica for a modern, clean look.
Include all the necessary details such as your restaurant’s name, address, and contact information at the top of the receipt. Make sure to leave enough space for this information to stand out without cluttering the layout.
Design the receipt to accommodate both tax and tip fields. Clearly label these sections and provide enough room for calculations. This ensures a smooth experience for both staff and customers during payment processing.
Customize the footer by adding a thank-you message or a call to action, like encouraging customers to leave feedback or follow on social media. Keep it short and to the point to avoid overwhelming the customer.
Ensure the receipt layout adapts to the hardware you’ll be using, whether it’s a thermal printer or a regular printer. This guarantees that the final printout looks as intended, without any text or images being cut off.
Finally, test the template on your system to make sure all the elements appear correctly before using it in a live environment. Make any adjustments as needed based on your printer’s settings or feedback from staff members.
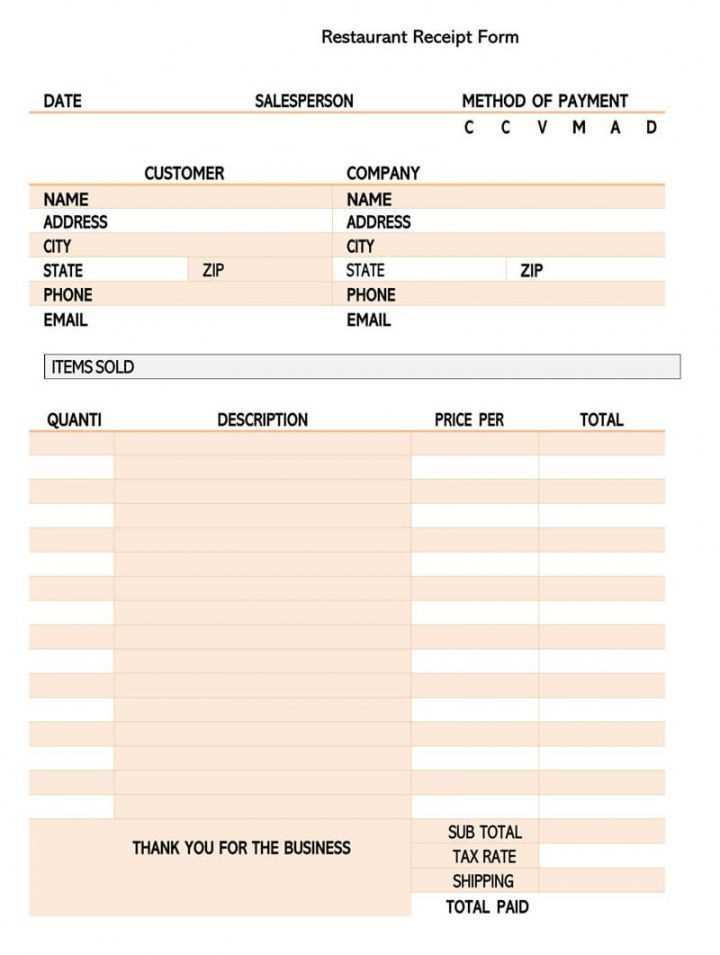
Each component on a restaurant receipt serves a specific function to ensure clarity and accuracy. By organizing the receipt into structured elements, businesses can provide a clear summary of the transaction while complying with legal and customer expectations.
The receipt usually begins with the name and address of the restaurant, often placed at the top. This is followed by a date and time of the transaction, helping both the customer and the restaurant track the purchase history.
Next comes a list of the items purchased. Each item is typically listed with a brief description, quantity, unit price, and total price for that item. This detailed breakdown is crucial for transparency, ensuring the customer knows exactly what they are paying for.
The subtotal reflects the sum of the individual item prices before any taxes, discounts, or gratuities are applied. A breakdown of tax and discount amounts is often included to ensure clear communication regarding how the final total was calculated.
The final amount is the total due, which includes the subtotal, taxes, and any added gratuities or service fees. This is the amount the customer will pay. If applicable, payment methods such as cash, card, or mobile payments are also noted on the receipt.
| Component | Description |
|---|---|
| Restaurant Information | Includes the name, address, and contact details. |
| Date and Time | Records when the transaction occurred. |
| Itemized List | Shows each item purchased with its price and quantity. |
| Subtotal | The total price before taxes and discounts. |
| Taxes and Discounts | Breaks down the tax applied and any discounts or promotions. |
| Final Total | The amount to be paid after taxes, discounts, and gratuities. |
| Payment Method | Indicates how the bill was paid (cash, card, etc.). |
Including these components ensures a smooth transaction process, creating trust between the restaurant and its customers. The clarity and transparency provided by a well-organized receipt are beneficial for both parties involved.
Use clean, legible fonts to ensure clarity. Fonts like Arial or Helvetica work well, as they are easy to read at various sizes. Avoid using overly decorative fonts that may distract from the important details.
Keep the Layout Simple
Stick to a structured layout with clearly separated sections. Organize details such as date, item list, total, and payment method in distinct areas. Use white space to prevent overcrowding and improve readability.
Highlight Key Information
Make totals and payment methods stand out. Bold or increase the size of these numbers to make them easy to find. This helps customers quickly check their charges without unnecessary effort.
Limit the use of colors. A professional receipt usually uses a simple color scheme that doesn’t overwhelm the customer. Consider using dark text on a light background for maximum contrast.
Use lines or borders to separate different sections. This visually guides the customer through the receipt and makes each part distinct. Avoid using too many borders, as they may make the design look cluttered.
Test the readability of your receipt. Print out a sample to see how it looks on paper. Ensure that everything is clear and well-aligned for the best presentation.
Ensure your receipt template accommodates various payment methods to meet customer preferences. Add placeholders for common options like credit cards, cash, mobile payments, and digital wallets. Below are steps to integrate payment methods effectively:
- Design separate fields for payment types: Use distinct areas for cash, card, and mobile payments. This makes it easier to track and reconcile transactions.
- Include fields for transaction details: For card payments, include the last four digits, and for mobile payments, the payment method (e.g., Apple Pay, Google Pay).
- Include a total amount field: Add an area for the total payment, taking into account any partial payments or tips.
- Consider digital receipt options: Enable customers to choose between physical and digital receipts to align with their payment method preference.
- Enable tax breakdowns: Include sections for tax amounts and show how each payment method contributes to the total sum.
By organizing payment fields clearly, you ensure customers understand the breakdown of their bill, enhancing their experience and simplifying your accounting process.
Integrating automatic receipt generation into your system starts by setting up a tool to collect data in real-time. Use a system that pulls transaction details, such as items purchased, price, taxes, and customer information directly from your point-of-sale (POS) system.
1. Use a Template Engine

A template engine lets you create reusable receipt templates. Define placeholders in your template for dynamic data like product names, prices, and total amounts. When a transaction occurs, the system fills in the placeholders with real-time data. Popular template engines include Handlebars and Mustache.
2. Integrate with Payment Gateways

Payment processors typically provide APIs that allow you to access transaction details. By integrating these APIs with your system, you can automatically generate receipts once a payment is processed, ensuring accuracy and consistency.
Example: If a customer pays via credit card, your system can use the payment gateway API to retrieve transaction data, then plug that into your receipt template and send it to the customer via email or print.
Finally, test your setup by simulating various types of transactions and verifying that the receipts generated are correct, ensuring the system works smoothly without manual intervention.
Organize templates in clearly labeled folders to make them easy to locate. Use descriptive names that reference key details like business type or receipt format. For example, label templates as “Restaurant_Receipt_v1” or “Invoice_Template_Takeaway” to avoid confusion.
Use cloud storage for easy access. Cloud services like Google Drive or Dropbox allow you to access templates from any device, ensuring you’re never far from the latest version. Set up shared folders if your team needs to collaborate or update templates.
Backup templates regularly to avoid accidental loss. Use automatic backups, and ensure your cloud provider includes version control to revert to previous versions if necessary. Local backups on an external drive add an additional layer of security.
Secure sensitive templates with password protection. If your receipts contain personal or financial data, ensure they are stored in encrypted folders or files. Cloud platforms often provide additional encryption options, adding an extra level of protection.
Version control helps track changes when editing templates. If you’re adjusting details or designs, consider using version numbers like “Receipt_v2.0” and “Receipt_v2.1” to monitor updates. This practice makes it easier to revert to previous versions and track template evolution.
Limit access to templates by assigning permissions to trusted team members only. Most cloud storage providers offer the option to set different access levels, from “view-only” to “edit,” ensuring only authorized personnel can make changes to receipt templates.
Test new templates before implementation. Always run a test print or digital version of your new receipt to ensure all fields display correctly and the formatting is consistent. This prevents issues when generating receipts for customers.
Editable Restaurant Receipt Template

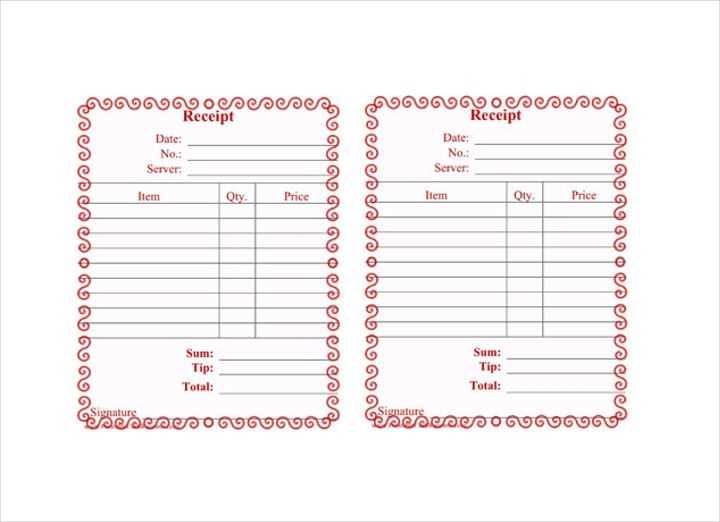
Designing a receipt template that adapts to your restaurant’s needs is key. Focus on simplicity and clarity to make sure all necessary details are included without overwhelming the customer. Include fields for the order, itemized prices, total amount, date, and a payment method section. Avoid clutter, leaving enough space for readability.
Customizing the Layout
When creating an editable template, keep the structure organized. Arrange the order information in a clear, logical flow: from customer name, order number, items ordered, to the total. You can use placeholder text, which can be replaced as needed, to streamline the process. This also allows flexibility for future changes.
Essential Information
Ensure the receipt covers all required legal and tax details, such as tax rates and business identification number. Adjust these details based on the location and regulations. The business logo can be added for branding, but avoid overwhelming the design with unnecessary elements.