For a smooth and reliable receipt process, using a clear and well-structured template makes a difference. A receipt not only serves as proof of transaction but also adds to your professionalism. A good template provides space for the necessary details and ensures consistency across all receipts issued. Here’s how to create or adapt one that meets your needs.
Start with including basic transaction information like date, seller and buyer details, and a clear list of purchased items or services. Don’t forget to add a section for total amount and payment method, so everything is documented. These components form the core of any receipt and allow both parties to verify the transaction with ease.
A well-organized template can also include optional sections like discounts, taxes, and a space for the receipt number, which adds an extra layer of tracking for both the issuer and the recipient. Tailor the template based on the nature of your business, whether it’s retail, service-based, or digital products, to reflect relevant transaction specifics.
Here’s the refined list with minimized word repetition:
Focus on clarity and consistency when creating your receipt template. Use clear labels for all fields like “Date”, “Item Description”, “Quantity”, and “Price”. This helps avoid redundancy and confusion. Incorporate a “Total” section near the bottom, summarizing all charges. This will make the receipt more user-friendly and accessible.
Key Tips for Clear Template Design:
Keep the layout simple, with enough space for users to input relevant data without overcrowding. Be specific with your labels to eliminate the need for extra explanations. Use standard terms for each field, ensuring consistency across templates.
Additional Notes:
Opt for a straightforward font and appropriate size to improve readability. Avoid unnecessary decoration or complex visuals that can distract from the essential details. Ensure your template can easily be adapted for different types of transactions without losing clarity.
- Sample Receipt Document Template
Use the following structure for a clear and straightforward receipt:
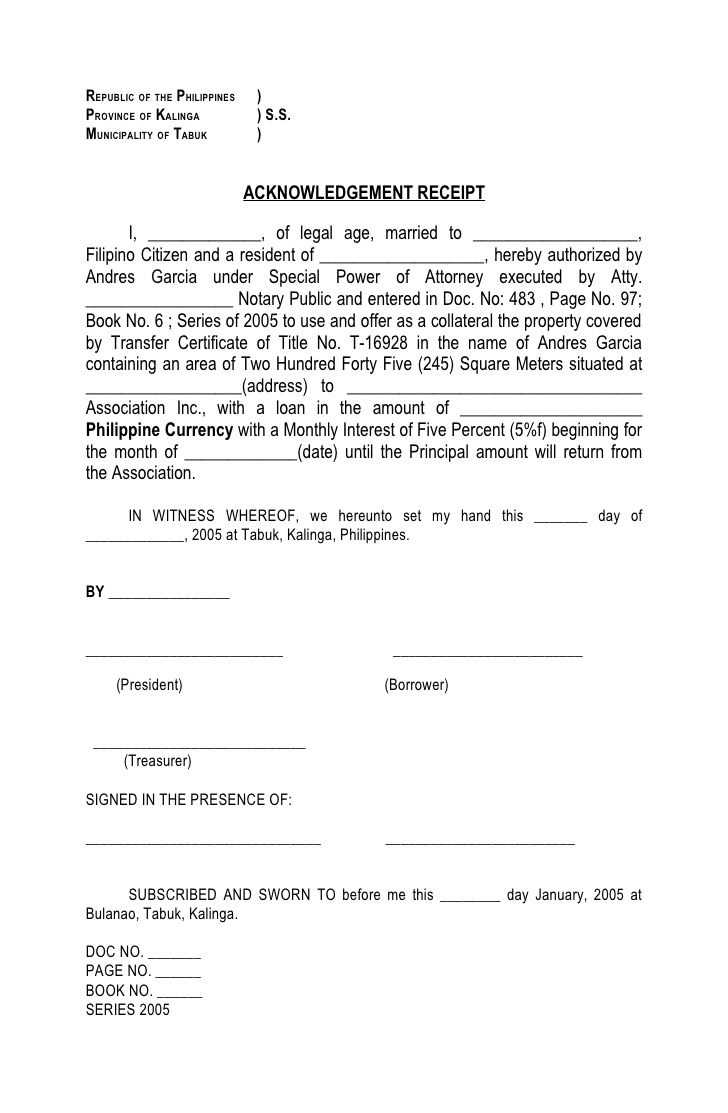
Receipt Number: [Assign a unique number for reference]
Date of Transaction: [Insert the date the payment was made]
Received From: [Name of the person or business making the payment]
Received By: [Name of the recipient]
Description of Goods or Services: [Provide a brief description of the items or services provided]
Amount Received: [Specify the amount received]

Payment Method: [Indicate how the payment was made, e.g., cash, check, credit card]
Reference Number: [Provide any reference number, invoice number, or transaction ID]
Additional Notes: [Include any other relevant details, if necessary]
This format ensures both parties have all the necessary information to confirm the transaction. Keeping a copy for your records is also recommended for future reference.
Open Microsoft Word and create a new blank document. Start by adding your business name and contact details at the top of the page. Include your logo, if necessary, to give the receipt a professional look. Place this information centrally or aligned to the left depending on your preference.
Next, add a heading such as “Receipt” or “Payment Receipt” beneath your contact details. This clearly indicates the document’s purpose. Use a bold and larger font size for visibility.
Below the heading, insert a section for transaction details. Include fields for the date of the transaction, receipt number, and payment method. Align these entries neatly for easy reading.
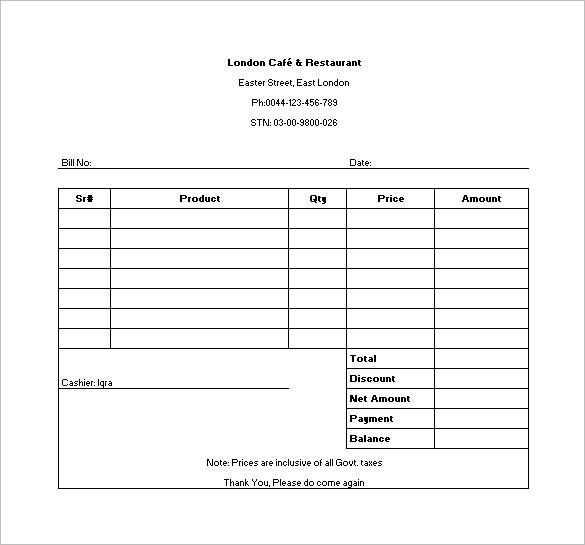
Following the transaction section, create a table or list to display the items or services purchased. Include columns for descriptions, quantities, unit prices, and total prices. Use a table for a clean layout that automatically adjusts when you add or remove items.
After listing the items, include a “Total” field at the bottom of the table, where you will calculate the total amount due. You can use Word’s built-in table functions to perform basic calculations, or manually input the total sum.
Finally, provide a thank you note or any additional instructions, such as refund policies, beneath the total. This adds a personal touch and wraps up the document professionally.
Review the entire receipt for clarity, accuracy, and completeness before saving or printing it. Adjust the formatting if necessary to ensure all text is legible and well-aligned.
To create a clear and organized receipt document template, include the following key fields:
| Field | Description |
|---|---|
| Receipt Number | Assign a unique number to each receipt for easy tracking and reference. |
| Business Name | Clearly state the name of the business or organization issuing the receipt. |
| Business Address | Provide the full address to help identify the location where the transaction occurred. |
| Phone Number | Include a contact number for customer inquiries or follow-ups. |
| Date of Transaction | Record the exact date of the transaction to maintain accurate records. |
| Itemized List of Products or Services | Detail the items or services purchased, including descriptions and quantities. |
| Total Amount | Indicate the total amount paid, including taxes and discounts, if applicable. |
| Payment Method | Specify the payment method used, such as cash, credit card, or check. |
| Signature | Provide a space for both the customer and business representative to sign if needed. |
By including these fields, your receipt will be clear, complete, and easy to reference.
For businesses in retail, your receipt should clearly list product details, including item name, quantity, price, and tax information. Include a return policy and store contact info for customer convenience. Make sure the layout is simple and easy to read for quick reference.
In the service industry, your receipt needs to reflect the type of service provided, the duration, and the hourly rate if applicable. Including a breakdown of any additional charges like tips or fees is useful. If applicable, add a section for scheduling future services or discounts on repeat visits.
For restaurants, a receipt should display the items ordered with corresponding prices and any gratuities. It’s also helpful to show order numbers for quick reference, especially in busy environments. Offering loyalty program details or coupons on the receipt can encourage return customers.
For construction or repair businesses, your receipt should include a detailed list of materials used, labor costs, and an itemized breakdown of any equipment rental charges. It is also beneficial to state warranty information for parts used or services rendered.
For subscription-based businesses, receipts should feature the plan type, billing cycle, and payment terms. Add renewal dates and cancellation policies to provide clarity. Including customer support contact information is useful for handling any billing inquiries.

Ensure your receipt has a clean layout and legible fonts. Use a standard font like Arial or Helvetica for clear readability. Avoid cluttered text and unnecessary details that can confuse the customer.
Start by organizing the receipt with logical sections. Separate the header, transaction details, and footer clearly to make each part easy to read at a glance. Use bold or larger fonts for the company name and key information such as the transaction total and date.
- Header: Include your company name, logo, and contact information. This establishes brand identity and makes your business easily reachable.
- Transaction Details: Display the list of items purchased, along with their prices and quantities. Organize this information in neat columns to avoid confusion.
- Footer: Include payment methods, return policies, and any relevant disclaimers or thank you messages.
Use spacing effectively to keep sections distinct. This allows the customer to quickly locate the most relevant information, such as the total amount or payment method. Don’t overcrowd the receipt with too much text.
Finally, consider using subtle background shading or borders for emphasis. This helps draw attention to critical information while maintaining a professional appearance.
To save your receipt template in a way that suits your needs, consider these formats:
- PDF: Ideal for printing or sharing via email. It preserves the design and layout exactly as you created it. Most word processors or online tools allow you to export documents as PDF files.
- Word Document (.docx): Perfect for further editing or customization. If you need to make adjustments later or share with others for collaborative editing, this format is recommended.
- Google Docs: A cloud-based solution that allows for easy access and sharing with anyone. You can also collaborate in real-time, making changes and viewing updates immediately.
- Excel/CSV: Useful if you want to create receipts with automatically generated data or calculations. This format can be particularly helpful for storing transaction details in a structured manner.
Sharing Your Template

Once saved, sharing the template is straightforward:
- Email: Attach your file as a PDF or Word document and send it directly to your recipients. Most email services handle these formats well.
- Cloud Storage: Upload your template to services like Google Drive, Dropbox, or OneDrive. Share the link with others for easy access and downloading.
- Sharing via Messaging Apps: Send a copy through platforms like WhatsApp or Slack, ensuring that recipients can quickly open or download the template on their devices.
By saving your template in multiple formats, you ensure accessibility for different needs, whether you’re printing, editing, or collaborating with others.
Incorrect Date – Always double-check the date of the transaction. An incorrect date could cause confusion for both the buyer and seller, especially in the case of returns or warranty claims.
Missing Contact Information – Ensure that the business name, address, phone number, and email are clearly listed on the receipt. This helps in case the customer needs to reach out for any issues.
Failure to Include Item Descriptions – It’s important to list the items purchased with a clear description, including quantity, unit price, and total price. A vague item description could lead to disputes over the transaction details.
Omitting Payment Method – Always indicate how the payment was made, whether by cash, credit card, or another method. This prevents any confusion or discrepancies if there is an issue with the payment later.
Not Providing a Total Amount – A common mistake is forgetting to include a total amount at the bottom of the receipt. This makes it difficult for customers to verify the final cost of their purchase.
Inaccurate Taxes – Make sure to correctly calculate sales tax or VAT. Incorrect tax rates could lead to legal and financial issues for both the business and customer.
Failure to Include Return Policy – Including return or exchange information on receipts can avoid potential misunderstandings. Ensure that your policy is clearly stated, so customers know their rights.
Now each word in the lines is repeated no more than two or three times.
Limit redundancy in your receipt document template to ensure clarity and professionalism. Keep sentences concise, using unique phrasing wherever possible. Focus on conveying necessary information without unnecessary repetition. For example, if a receipt mentions a service multiple times, vary the wording or combine the related details into one section.
Key Strategies for Reducing Redundancy

Use synonyms or restructure sentences to prevent the same word from appearing too often. This enhances readability and makes the document feel more polished. Avoid overuse of terms like “receipt,” “service,” or “amount” by finding alternatives or eliminating excess wording.
Refining Clarity Through Brevity

Be clear and to the point. If a term appears more than necessary, evaluate whether it’s essential to repeat it or if a simple reference will suffice. Rewriting overly repetitive lines not only simplifies the document but also strengthens its message.