Creating a New York City taxi receipt template requires accurate information that complies with the city’s transportation regulations. This template should include the date of the ride, pickup and drop-off locations, fare breakdown (base fare, tip, taxes), and the driver’s information, such as name and license number. Make sure the template is clear, well-structured, and easy to read, especially if it needs to be submitted for business or reimbursement purposes.
To make sure your taxi receipt stands up to New York City’s standards, include a unique receipt number for tracking. Additionally, consider integrating options for both cash and credit card payments. Each type of payment should be clearly marked on the receipt. With this in mind, an organized format will prevent confusion for both the driver and the passenger.
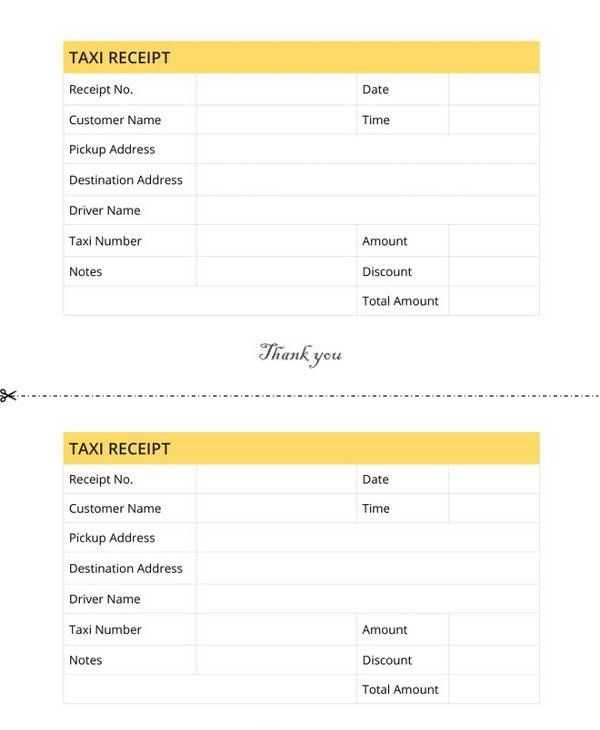
If you’re creating a template to use frequently, try to include placeholder fields where essential details can be filled in easily, such as amount paid, payment method, and time of service. This allows you to quickly generate receipts without manually inputting repetitive data each time.
Here’s how to rephrase lines to avoid repetition while keeping the meaning and structure intact:
To reduce redundancy, begin by varying sentence structures. Instead of repeating the same format, mix in passive and active voice where appropriate. For example, change “The taxi driver gave a receipt” to “A receipt was provided by the driver.” This maintains the same meaning but avoids repetition.
Next, use synonyms or reframe phrases. For instance, instead of saying “total amount” repeatedly, switch it with “overall cost” or “final charge” depending on context. This keeps the text fresh while retaining clarity.
Additionally, remove unnecessary words. Rather than saying, “The receipt includes the total amount of the fare along with taxes and tip,” simplify it to “The receipt shows the fare, taxes, and tip.” This is more concise and effective.
Finally, consider rearranging the sentence flow. For example, instead of repeating “The time and date are listed on the receipt,” vary the order: “The receipt lists the time and date of the ride.” This helps reduce the feeling of repetition without changing the meaning.
| Original Phrase | Rephrased Version |
|---|---|
| The taxi driver gave a receipt | A receipt was provided by the driver |
| The total amount is displayed on the receipt | The receipt shows the total charge |
| The receipt includes the amount of the fare | The fare amount appears on the receipt |
| The receipt also contains the tip and taxes | Tip and taxes are listed on the receipt |
- New York City Taxi Receipt Template Guide
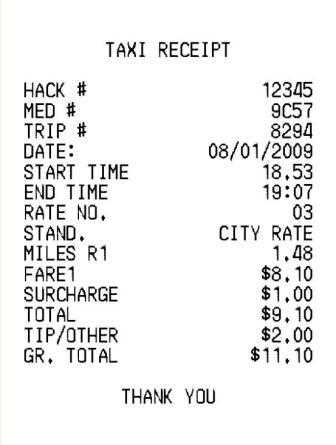
Start by including clear and specific details about the taxi ride. This will make your receipt both accurate and useful for future reference. A typical NYC taxi receipt includes the following information:
- Taxi medallion number: This is a unique identifier for the taxi and should be prominently displayed.
- Date and time: Specify the date and time of the ride, including the start and end time if possible.
- Pickup and drop-off locations: Clearly list the starting and ending locations of the trip.
- Fare breakdown: Include all components of the fare such as base fare, distance traveled, time, surcharges, and any other applicable fees (e.g., tolls, airport surcharges).
- Payment method: Specify how the fare was paid (e.g., credit card, cash, etc.) and any tips provided.
- Total fare: The final amount due after all charges, including tips.
The template should also contain a few additional pieces of helpful information:
- Driver’s name and ID number: This is important for identifying the driver in case of any issues.
- Taxi company’s contact info: Include the company name, phone number, and website in case a customer needs assistance.
- Receipt number: This helps to track the transaction and can be useful for both the customer and the company in case of disputes.
Design the receipt so it is easy to read and professional. The information should be neatly organized, with each detail on its own line or section. Avoid unnecessary details and keep the focus on the ride information that the customer will need to review.
Finally, ensure your template is adaptable for both paper and digital formats. A well-organized, user-friendly receipt can provide a more seamless experience for your customers, whether they are using it for expense reporting, reimbursement, or simply for their own records.
To create a custom NYC taxi receipt, begin by designing a simple layout that includes key details like the date, time, fare, and driver information. Use a spreadsheet program or design software like Canva for this task. Ensure you add the trip’s start and end locations, which are often required for expense tracking or personal records.
Next, include a unique receipt number for each ride to maintain organization and easy reference. This number can be generated automatically using a simple formula in a spreadsheet or manually assigned if you prefer a more personal touch.
Don’t forget to insert the fare breakdown, which should show the base fare, any additional fees (such as tolls or tips), and the total amount paid. If applicable, add a payment method section (cash, card, or another method). This makes the receipt feel authentic and clear to anyone reviewing it.
Finally, place your custom receipt template in a printable format (like PDF) for easy access. This allows you to keep a hard copy of your receipts for reference, especially when managing personal expenses or tracking taxi rides for business purposes.
Your NYC taxi receipt should provide clear and accurate details for record-keeping. Here are the key elements to include:
1. Taxi Medallion Number
This unique identifier should appear prominently. It helps confirm the taxi’s legitimacy and is used for tracking purposes. It can usually be found on the side of the vehicle and should be printed on the receipt for verification.
2. Date and Time
The date and time of the ride are critical for matching the receipt to the ride. Ensure both the start and end times are displayed clearly, especially for longer trips where this information is needed for precise billing or travel tracking.
3. Fare Breakdown
A detailed breakdown of the fare gives transparency. Include the base fare, any extra charges like tolls or surcharges, and tip amounts. This helps customers understand how the total fare is calculated.
4. Pickup and Drop-off Locations

List both the starting and ending points of the ride. This helps the passenger recall the route taken and ensures there is no confusion about the service provided.
5. Driver Information

The driver’s name, license number, and even the vehicle’s license plate number should be on the receipt. This provides a way to reach out for feedback or resolve any disputes.
6. Total Amount Charged

Finally, the total amount the customer paid for the trip should be clearly displayed. Include any taxes or service fees that contribute to the total fare.
Include your business logo and contact information at the top of your receipt. This will help customers identify the service quickly and allow them to reach out easily if needed. Make sure your logo is clear, and that your phone number, email, and address are easy to find.
Set up a clear breakdown of the charges to give transparency to your customers. List fare, additional charges (such as tips, surcharges, or tolls), and the total amount. This not only helps customers understand their payment but also ensures you’re correctly reporting your earnings for taxes or financial records.
Add a space for payment method and transaction ID. This detail is helpful for both you and your customer to track the transaction. It’s especially important for businesses that provide reimbursement or need to verify payments for accounting purposes.
Customize the date and time format to match your regional standards. A receipt that includes both the date and exact time of the trip helps with accuracy in record-keeping. For international businesses, adapting to local time formats can avoid confusion.
Offer a digital receipt option for customers who prefer not to keep paper. You can email the receipt or send it via SMS with a link. Adding a QR code can also be a convenient way for customers to quickly access their receipts online.
Ensure that the font and layout are legible. Use a simple, clean design for easy readability. Stick to basic fonts and avoid clutter. The receipt should serve its purpose without overwhelming the customer with too much information.
How to Create a New York City Taxi Receipt Template

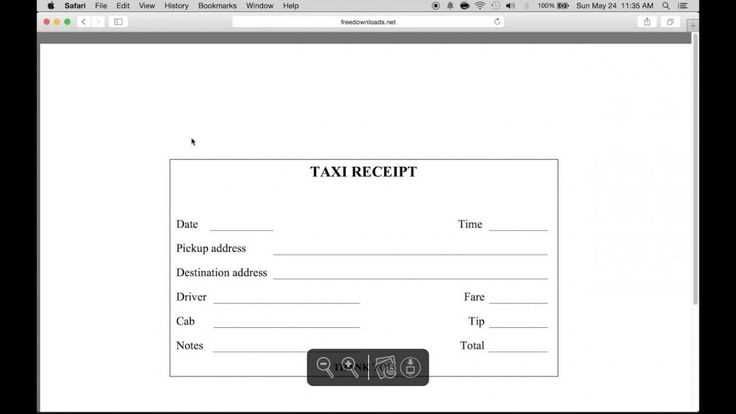
The key to designing a clear taxi receipt template lies in ensuring all essential details are included without overwhelming the recipient. Focus on displaying the driver’s name, vehicle number, pick-up and drop-off locations, and total fare in an easily readable format. This creates a straightforward and professional receipt that customers can reference without confusion.
To create a concise yet informative “Taxi Receipt Template,” it’s helpful to break the receipt into logical sections. Start with the header, which should contain the company’s name and logo, followed by a section for the trip details. The trip details should be placed in a way that clearly shows the start and end times, distance, and any extra charges such as tolls or tips.
Make sure the layout remains uncluttered by grouping related information. For example, a section dedicated to payment methods can be placed separately from the trip information, making it easier to understand the charges. Lastly, the receipt should include a unique receipt number for record-keeping purposes.