To create a simple and clear Uber taxi receipt template, start with the core elements: the date, the trip details, and the cost breakdown. Include the rider’s name, pickup and drop-off locations, along with the time and date of the trip. Provide a clear line-item breakdown, showing the fare, any discounts, and taxes applied.
Ensure that the total amount is highlighted and easy to find. Adding a section for payment method and a unique receipt ID will help track and verify the transaction. To make it user-friendly, consider grouping related details together and using bold or underlined text for key sections like total cost or payment method.
For clarity, keep the formatting simple and avoid cluttering the receipt with unnecessary information. A clean layout makes it easier for users to understand the charges at a glance, which is especially important for those using it for expense tracking or reimbursement.
Here’s a detailed plan for an informational article on the topic “Uber Taxi Receipt Template” with 6 practical and specific headings in HTML format:
1. Understanding Uber Taxi Receipts
Uber receipts include essential transaction details such as fare, trip route, and payment method. Each receipt reflects charges clearly, ensuring users understand their expenses after a ride.
2. Key Elements of an Uber Receipt Template

The template should contain the ride’s date and time, total fare, breakdown of charges, pick-up and drop-off locations, and payment details. Providing this information ensures clarity and transparency.
3. Customizing the Template for Your Business
To fit your needs, adjust the Uber taxi receipt template by adding company branding or customizing charge descriptions. This allows better integration with your business style or service-specific features.
4. How to Generate Uber Receipts Automatically
Uber offers automated receipt generation through the app. For businesses, integrating an API can enable auto-generation of receipts upon ride completion, streamlining administrative tasks.
5. Managing Multiple Receipts for Record Keeping
Use digital storage or cloud services to track and organize multiple Uber receipts. This simplifies accounting and ensures easy retrieval for future reference.
6. Legal Considerations in Receipt Creation
Check local regulations to ensure your receipt complies with tax and invoicing laws. Including necessary details like VAT or service charges may be required depending on jurisdiction.
- Uber Taxi Receipt Template: A Complete Guide
To create a well-structured Uber taxi receipt, include the following key details:
Necessary Information
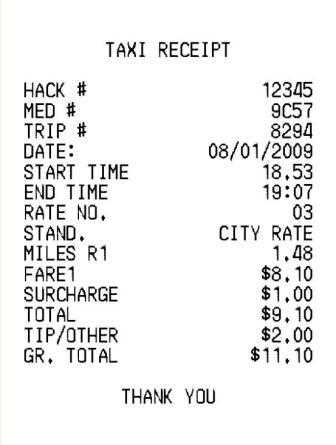
Ensure the receipt includes the ride date and time, pickup and drop-off locations, and the trip fare breakdown. The fare should be itemized to show base fare, time, distance charges, surcharges, and taxes. It’s also important to list the total amount charged, payment method, and any tips provided.
Format and Layout
Use a clear and consistent layout. Start with the Uber logo at the top, followed by the driver’s details and ride information. Make sure all financial details are easy to read, with bold text for totals. Include the ride receipt number and a unique identifier for quick reference. Ensure the receipt is in a format that is printable or can be saved digitally.
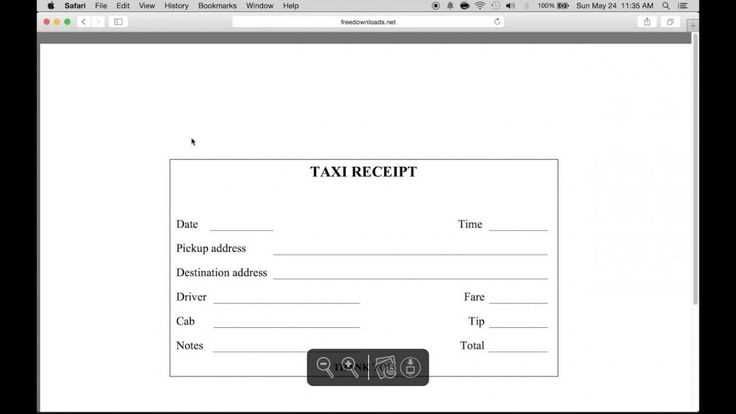
Design your Uber receipt template with key information that aligns with your needs. Begin by including the passenger’s name, ride details, and payment breakdown. Make sure to add sections for the pick-up and drop-off locations, time, and total fare.
Step 1: Choose a Template Format
Pick a clean, straightforward format like a table or a list. Keep the layout simple but organized. You can use tools like Microsoft Word, Google Docs, or even HTML to create your template, depending on your preference.
Step 2: Add Relevant Details
Include the ride date, total fare, and breakdown (base fare, time, distance, surcharges, and tips). If you’re including the driver’s name or vehicle details, ensure they are clear and easy to locate in the template.
Once you’ve selected the template format and added the relevant data, adjust fonts and spacing for clarity. Keep the template visually neat and free from unnecessary elements.
Make sure to include clear and accurate ride details in your receipt template. This helps both you and your passengers easily review the transaction and provides all necessary information for record-keeping. Below are the key elements to include:
- Pick-up and Drop-off Locations: Always display both locations clearly. Specify street addresses or landmarks for accurate identification.
- Time and Date: Include the exact time the ride started and finished, down to the minute, to avoid confusion.
- Distance Traveled: Add the total miles or kilometers traveled during the ride. This can help passengers understand the pricing breakdown.
- Fare Breakdown: Provide a detailed list of charges, including base fare, time, distance, and any additional fees such as tolls or surge pricing.
- Payment Method: Clearly show whether the payment was made via credit card, cash, or another method. Include the last four digits of the card number, if applicable.
- Driver Information: Include the driver’s name, vehicle model, and license plate number for easy identification.
These details ensure that passengers have all the necessary information to understand the cost and logistics of their ride, while also offering a professional and clear receipt.
Include payment details to provide a clear breakdown of the transaction. These details are necessary for users to verify charges and understand the payment method used.
1. Specify Payment Method
Indicate the method of payment, such as credit card, debit card, or a mobile wallet. This helps users identify which method was used for the transaction.
2. List the Transaction Details

Display the amount charged, any tips, and additional fees. Break down these components in an easy-to-read format to ensure transparency.
- Payment amount
- Service charges
- Tip (if applicable)
- Discounts (if applicable)
3. Include Tax Information
If tax is applicable, show the breakdown of the tax rate and total amount. This gives users full clarity on how the total cost is calculated.
4. Add a Unique Transaction ID
Assign a transaction ID to each receipt. This helps users reference their payment in case of any issues or discrepancies.
5. Display Payment Confirmation
Confirm the payment status as “Completed” or “Pending.” This confirms whether the payment was processed successfully.
Ensure that your receipt is clean and easy to read. Use a simple font, such as Arial or Helvetica, with a size between 10-12 pt. Avoid decorative fonts that may distract from the main information. Keep the font color dark (preferably black or dark gray) for better contrast against the background.
Consistent Alignment
Align text and numbers consistently. For instance, keep the item names and prices aligned to the left, while the total amount should be aligned to the right. This enhances readability and creates a polished look.
Clear Sectioning

Break down the receipt into clear sections. Label sections such as “Date”, “Pickup”, “Drop-off”, and “Fare Breakdown” clearly, using bold or slightly larger text. This helps the reader quickly locate relevant information without unnecessary scrolling or searching.
To automate the generation of Uber receipts, leverage the Uber API. By integrating the ride receipt endpoint into your system, you can easily retrieve transaction details such as fare breakdown, payment method, trip distance, and driver information. This method eliminates manual entry and ensures consistency in every receipt generated.
Start by setting up an API request that fetches the necessary data, such as ride_id and receipt_url, from Uber’s platform. Once you have this information, you can create a dynamic template that pulls the relevant details into a formatted receipt, suitable for both email and print.
To speed up the process, store customer and ride data in a secure database. This allows for the quick retrieval of previous trips, minimizing the need for repeated data entry. You can set up automated triggers to send receipts after each ride, saving both time and effort for both you and your customers.
For further customization, integrate payment gateways and other financial systems to add invoicing or tax breakdowns to the receipts. This level of automation not only streamlines operations but also enhances the customer experience by providing timely, accurate receipts after every trip.
Accurate data entry is the foundation of a reliable Uber receipt template. To ensure precision, verify all relevant details before finalizing the template. This includes ensuring that the ride date, time, distance, and fare breakdown are correct. Each field should be checked for typos or misplaced numbers, as even minor discrepancies can lead to confusion or errors.
Details to Double-Check
Pay special attention to these key details in your template:
| Detail | Action |
|---|---|
| Ride Date and Time | Ensure accuracy by matching these fields with the trip history or GPS logs. |
| Distance | Cross-check with the route taken, either manually or using GPS data. |
| Fare Breakdown | Verify that all charges, such as base fare, taxes, tips, and discounts, are clearly listed and calculated correctly. |
| Passenger Information | Confirm that the rider’s name, contact details, and payment method are accurate. |
Additional Tips for Precision
Be consistent with the format used across your template. This helps maintain a uniform structure, reducing the chances of errors. Check for proper alignment and spacing in all sections, ensuring that no information is missed or cut off. If needed, use automated tools or templates to minimize human error and streamline the process.
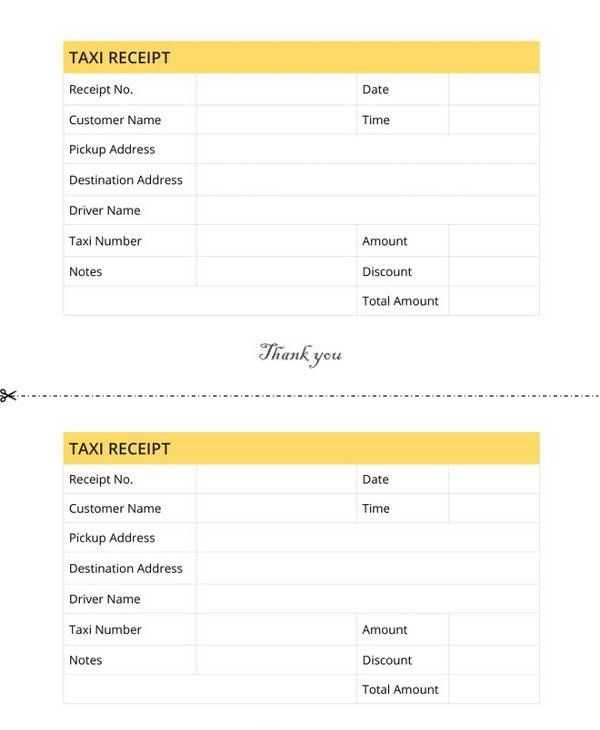
To create a clean and professional Uber taxi receipt template, ensure the following key elements are included:
- Ride Date and Time: Clearly display the exact date and time of the ride, ensuring users know when the trip took place.
- Pickup and Drop-off Locations: Indicate both the starting point and the destination of the ride with specific addresses or general locations.
- Fare Breakdown: Provide a transparent breakdown of the total fare, listing any applicable taxes, tips, and discounts. This promotes clarity for both drivers and passengers.
- Payment Method: Specify the payment method used (e.g., credit card, PayPal, Uber credit) to avoid any confusion.
- Receipt Number: Assign a unique receipt number for tracking and reference purposes.
- Driver Details: Include the driver’s name, vehicle model, and license plate number for verification.
These elements should be formatted neatly, using bullet points or clear sections, for easy reading. Keep the design simple but detailed enough to avoid any ambiguity.