Creating a structured and professional receipt for services in MS Word ensures clear documentation of transactions. A well-designed template includes essential details such as service descriptions, dates, amounts, and client information. Instead of starting from scratch, using a pre-made template saves time and maintains consistency across multiple receipts.
MS Word offers various formatting tools to customize a receipt according to business needs. Tables help organize information, while text formatting options enhance readability. Adding a company logo or signature field improves authenticity, making the document more reliable for both parties.
For quick access, Microsoft provides built-in receipt templates that can be modified to match specific requirements. Alternatively, a custom template with preset fields streamlines future use, reducing manual entry. With proper design and structure, a receipt template in MS Word simplifies record-keeping and ensures compliance with financial documentation standards.
Receipt of Services Template in MS Word
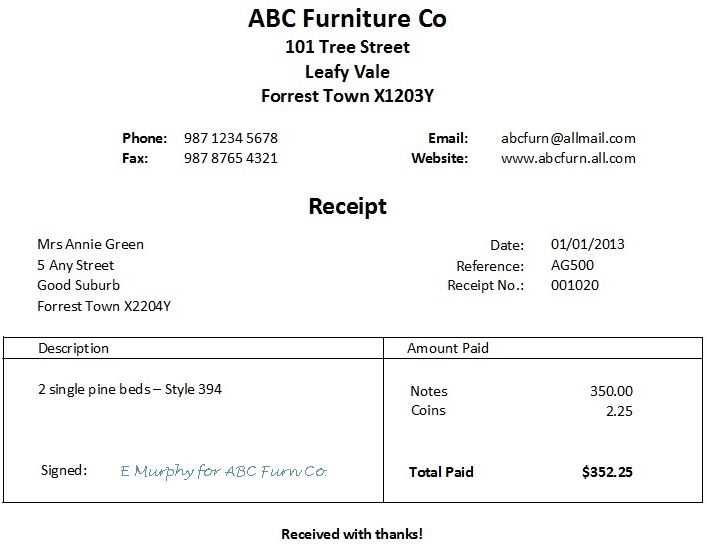
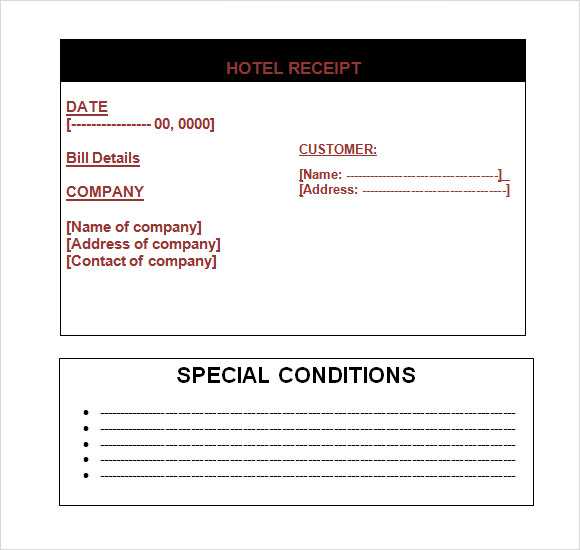
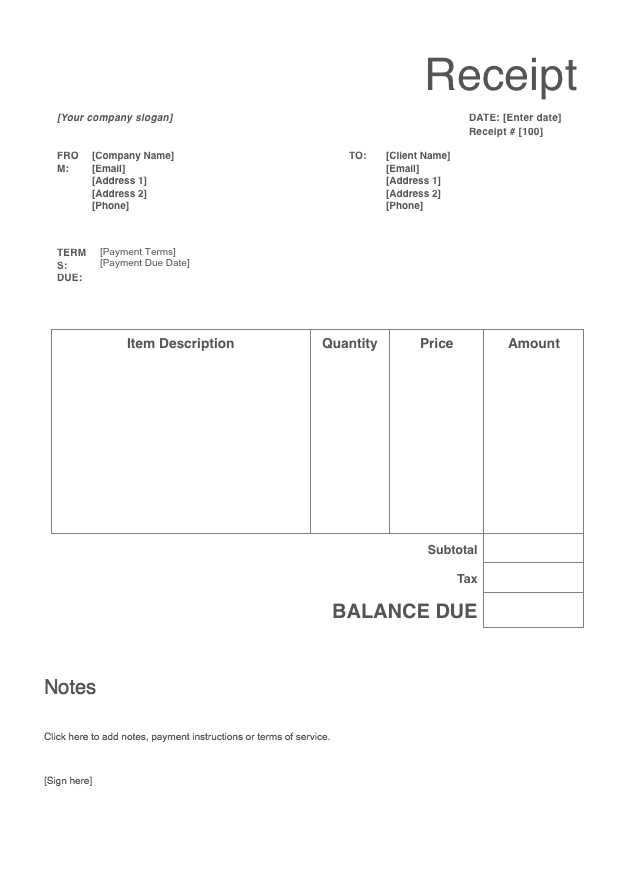
Use a structured layout to ensure clarity. Start with a header that includes your business name, address, and contact details. Below, add the recipient’s information, including their name and address.
Include a clear table with columns for service descriptions, dates, hours worked (if applicable), rates, and total cost. Ensure all amounts are correctly calculated and provide a subtotal, taxes (if needed), and the final amount due.
Specify the payment method and terms. Indicate whether the payment was made in full or if a balance remains. If applicable, include a unique receipt number for tracking.
Use a professional font and keep formatting simple. Save the template as a Word document for easy customization. To streamline future use, set up form fields for quick data entry.
Key Elements to Include in a Service Receipt Template
Ensure the receipt provides clear details about the transaction by including the following elements:
| Element | Description |
|---|---|
| Business Information | Include the company name, address, phone number, and email to establish credibility. |
| Receipt Number | Use a unique identifier for tracking and record-keeping. |
| Client Details | List the client’s name and contact information for reference. |
| Date of Service | Specify when the service was provided to avoid disputes. |
| Service Description | Clearly outline the services rendered, including quantities or hours worked. |
| Cost Breakdown | Detail service charges, taxes, and discounts to maintain transparency. |
| Total Amount Due | Summarize the final amount, including all applicable fees. |
| Payment Method | Indicate how the payment was made (cash, card, bank transfer, etc.). |
| Authorized Signature | Provide space for signatures to confirm agreement. |
| Terms and Conditions | Include refund policies or service guarantees for clarity. |
Using these elements ensures the receipt is informative and legally valid.
How to Customize a Service Receipt Template in MS Word
Open the template and replace placeholder text with actual business details. Update the company name, address, and contact information to ensure accuracy.
Modify the table structure if needed. Adjust column widths, add or remove rows, and format text for clarity. Use the “Table Design” tab to apply styles that match your branding.
Insert a logo by clicking “Insert” > “Pictures.” Resize and position it in the header for a professional look. Adjust alignment settings to prevent layout shifts.
Customize fonts and colors under the “Design” tab. Select a readable font and use brand colors to maintain consistency. Avoid overly decorative styles that may reduce readability.
Enable automatic calculations for totals. Select the total cell, go to “Layout” > “Formula,” and enter a SUM function to calculate item costs automatically.
Save the template as a reusable file. Click “File” > “Save As,” choose “Word Template” (.dotx), and store it in an accessible location for future use.
Using Tables and Formatting for Clear Presentation

Use tables to organize service details, ensuring easy readability. Create columns for service descriptions, quantities, unit prices, and totals. Keep headers bold for quick reference.
Align text consistently within each column. Left-align descriptions, right-align prices, and center-align headers. Use a light border for structure without overwhelming the content.
Apply shading to header rows for distinction. Alternate row colors enhance readability in long tables. Use a legible font with adequate spacing to avoid clutter.
Keep formatting simple. Overuse of colors, borders, or fonts distracts from key details. Stick to professional, clean layouts that highlight essential information.
Adding Logos, Signatures, and Business Details
Insert a logo by clicking Insert → Pictures and selecting the file. Resize and position it using the Picture Format tab to align with the document’s layout.
For signatures, use Draw → Ink if using a touchscreen or insert a scanned image via Insert → Pictures. Adjust size and transparency under Picture Format for a natural look.
Add business details by inserting a Text Box from Insert → Text Box. Format the text using Home → Font and Paragraph settings to ensure clarity. Align it with other elements for a polished appearance.
Saving, Printing, and Sharing Service Receipts
Save service receipts directly in Microsoft Word by selecting File > Save As and choosing a secure location. For easy retrieval, use a consistent naming format like Service_Receipt_YYYY-MM-DD. If needed, convert the document to PDF by selecting File > Export > Create PDF/XPS.
Printing Options

- Adjust margins and layout under File > Print > Page Setup to ensure proper formatting.
- For bulk printing, set the desired number of copies and select a high-quality print setting.
- Use a PDF printer like Microsoft Print to PDF if a hard copy isn’t required but a finalized format is needed.
Sharing Methods
- Email: Attach the Word or PDF file directly to an email for quick distribution.
- Cloud Storage: Upload to OneDrive, Google Drive, or Dropbox for access from multiple devices.
- Direct Link: If using a shared document folder, generate a view-only link to maintain security.
Regular backups prevent data loss. Automate this by enabling cloud synchronization or setting up scheduled backups on an external drive.
Common Issues and Troubleshooting in MS Word Templates
When using MS Word templates, users may encounter several common issues that can hinder productivity. Addressing these problems efficiently can save time and improve the overall user experience. Here are some frequent problems and their solutions:
- Formatting Discrepancies: Templates may display different formatting than expected, especially when shared across devices. To fix this, ensure the template is set to the correct page layout and font styles. Reapply the styles by selecting the affected text and using the Format Painter tool.
- Inconsistent Placeholder Text: Sometimes, placeholder text fails to update or disappears entirely. To prevent this, avoid editing text directly within a placeholder box. Instead, ensure the placeholders are linked properly to the content control and fields.
- Broken Links: Hyperlinks within templates may become broken, especially when files are moved. To resolve this, check the link paths and update any outdated URLs or file locations. Use the “Insert” tab to re-link the content if necessary.
- Compatibility Issues: Templates may not work as expected across different versions of MS Word. If you are using an older template, try saving it in the latest Word format to ensure compatibility. Alternatively, use the “Check Compatibility” feature in Word to identify any compatibility issues.
- Slow Performance: Large templates with many images or embedded objects can cause MS Word to slow down. To improve performance, reduce the size of images or replace high-resolution files with smaller versions. Additionally, avoid excessive use of complex formatting or objects that increase the file size.
- Template Corruption: Occasionally, templates may become corrupted, leading to loss of data or formatting. If this happens, try opening the template in Safe Mode or recovering it using the Word AutoRecover feature. Always keep backups of important templates to minimize data loss.
By identifying these common issues and applying the recommended fixes, you can enhance your experience with MS Word templates and ensure smooth document creation and editing processes. Regularly updating templates and keeping software up to date also contributes to avoiding many of these problems.


