If you need to create a receipt quickly, a Word 2007 receipt template provides a practical solution. With just a few adjustments, you can have a professional-looking receipt tailored to your needs. Start by choosing a template that suits the nature of your transaction, whether it’s for a product sale, service, or rental.
Customizing your template is straightforward. You can modify fields such as date, customer information, and payment details. This makes it easy to generate receipts with accurate and up-to-date information every time. For businesses, a well-designed template can add a touch of professionalism to every sale.
To get the most out of your Word 2007 receipt template, ensure the layout is clear. A clean design will help both you and your customers easily review the transaction details. Make sure all necessary fields are included, such as itemized list of purchases, total amount, and any taxes applied.
Once your template is set up, saving it as a reusable document will save you time. You can easily duplicate the receipt for future use, adjusting only the specific details for each transaction. This way, your receipts remain consistent and organized.
Here is the revised version:
To create a professional receipt template in Word 2007, begin by adjusting the page layout. Set the margins to narrow to maximize space, and ensure the paper size is set to A4. Next, insert a header for your company name, contact details, and logo, if applicable. Use a bold font for easy visibility.
Structuring the Receipt
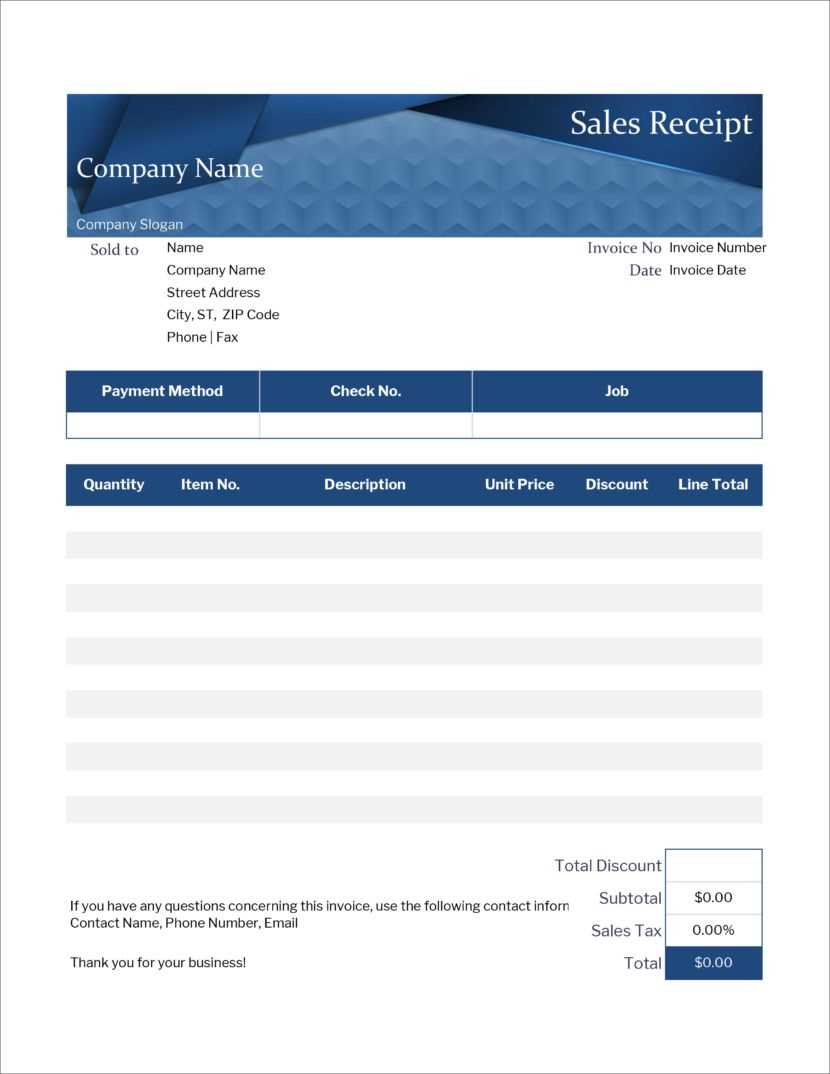
Start with a table that includes clear sections for the transaction details. The first row should have columns for “Item Description,” “Quantity,” “Unit Price,” and “Total.” Ensure these columns have equal widths for neat alignment. Use borders for separation between items and totals to maintain readability.
Adding Payment and Additional Information
Below the table, include a payment section where you can input the total amount due, taxes, and any discounts applied. Ensure there is space for both the method of payment and the date of the transaction. For extra clarity, add a footer with your business’s return policy or any legal disclaimers.
- Word 2007 Receipt Template: A Practical Guide
To create a practical and functional receipt template in Word 2007, use the built-in table feature to structure your layout. Start with a simple table that includes rows for the receipt number, date, item description, quantity, price, and total. Adjust the column widths to fit the content, and make sure the text aligns properly for clarity.
Use the “Borders and Shading” option under the “Design” tab to add a professional look to your receipt. You can select a clean border style or a light background color to highlight key sections. Also, apply bold or italics to make headings stand out, such as “Receipt Number” or “Total Amount”.
Consider adding a section for the company name, address, and contact details at the top, which makes the receipt more official. For a smoother experience, you can create placeholders where information like the item name, price, and quantity can easily be replaced with new data for each transaction.
Finally, save your template as a .dotx file so it can be reused. This ensures you won’t need to recreate the layout each time you issue a new receipt. With this simple structure and formatting, you’ll have a customizable, professional receipt template ready for various business or personal needs.
To create a customized receipt template in Word 2007, start by opening a new blank document. This allows full control over design elements, making it easier to add specific fields and tailor the layout to your needs.
Step 1: Set up the document layout

Click on the “Page Layout” tab to adjust margins and orientation. For receipts, use the default margins or select custom margins to fit your preferred size. You can also choose portrait or landscape orientation, depending on how you want the receipt to appear.
Step 2: Add a header
A header is essential for adding your business name, logo, and contact information. Click on the “Insert” tab and choose “Header” to select a style. Customize it by typing your company details and inserting an image for the logo if needed.
Step 3: Design the receipt table
Use a table to organize the content of the receipt, such as the item list, quantity, price, and total amount. Select the “Insert” tab, then click “Table” to insert a table with the desired number of columns and rows. Resize and adjust the columns based on your content needs. Label the columns with headers like “Description”, “Quantity”, “Unit Price”, and “Total”.
| Description | Quantity | Unit Price | Total |
|---|---|---|---|
| Item 1 | 1 | $10.00 | $10.00 |
| Item 2 | 2 | $5.00 | $10.00 |
| Subtotal | $20.00 | ||
Step 4: Insert payment details
Below the table, include payment details like the method of payment, transaction number, or any discounts applied. Simply type the relevant information in plain text, or use a new table to structure the payment information clearly.
Step 5: Add footer
For the footer, add terms and conditions, or a thank you message for the customer. This can be done by typing in the footer area, which can be accessed through the “Insert” tab by selecting “Footer”. Customize it to match your business tone.
Save your customized receipt template by clicking “File”, then “Save As”. Choose the Word template format (.dotx) to easily reuse it for future receipts.
To include payment information in your Word 2007 receipt template, focus on adding custom fields that provide clear payment details. Begin by inserting placeholders for each field you want to customize, such as the payment method, transaction ID, or due date.
Adding Payment Method
Use the Insert tab to add a text box where payment methods like credit card, cash, or bank transfer can be inserted. Label it appropriately to ensure clarity. You can even create a drop-down list if you plan on using the template frequently for various methods. This ensures uniformity in your receipts.
Transaction Details

For transaction information, insert fields like transaction ID and date. To do this, navigate to Insert > Quick Parts > Field and select a field type such as “Date” or “Number”. This approach makes it easy to automatically update transaction details without manually entering data each time.
Customize the layout further by adjusting fonts and spacing to match your design. Ensure that payment fields are clearly distinguishable from the rest of the receipt, making them easy for the recipient to spot.
Don’t forget to check for consistency across all fields. The more structured your template is, the easier it will be to adapt it for different transactions. Test the template by filling out all fields to ensure smooth operation before using it regularly.
To make your receipt template stand out, ensure the layout is neat, clear, and easy to follow. Start by choosing a clean, professional font like Arial or Calibri for readability. Use font sizes between 10-12 pt for text and 14-16 pt for headings to maintain a balanced look.
Setting up Margins and Spacing

Adjust the margins to 1 inch on all sides to give the document space and prevent clutter. Set line spacing to 1.15 or 1.5 to enhance readability, especially in sections with more information. Use spacing before and after paragraphs to separate different parts of the receipt.
Aligning and Structuring the Content
- Header: Position your company name, logo, and contact details at the top, aligned to the center. Consider using bold for key elements like the title “Receipt” and the date.
- Itemized List: Use tables to neatly organize the product or service details. Include columns for description, quantity, unit price, and total. Remove table borders for a cleaner look.
- Total: Ensure the total is clear and stands out by making the font bold and slightly larger. Position the total at the bottom of the receipt.
Incorporating these simple formatting techniques in Word 2007 will give your receipt template a polished and professional appearance. Keep the design consistent across all sections to make the document look cohesive.
Reducing Repetition While Maintaining Meaning
Minimizing repetition in your document makes it more concise and readable without losing its intended message. Instead of repeating the same idea or concept multiple times, focus on rephrasing or providing a new perspective to keep the content fresh while preserving its meaning.
Clear and Direct Phrasing
Opt for clearer, more direct language that conveys your point in fewer words. Avoid unnecessary qualifiers or redundant expressions that don’t add value to the main idea. By being straightforward, you can eliminate repetitive phrases while keeping the text engaging.
Use of Synonyms

Introduce synonyms or related terms to replace repeated words or phrases. This keeps the content varied and dynamic. For example, instead of repeatedly using “important,” you could switch between terms like “key,” “crucial,” or “vital” depending on the context.